Managers portal guide
The managers portal is used to easily manage your team's timesheets and leave requests.
This guide covers:
- Logging in
- Managing your team's timesheets
- Managing your team's leave requests
For a PDF copy of this guide, please click here.
Logging in
Your managers portal is found at https://login.smartly.co.nz, and you can login with the same username and password that you use for your Smartly app.
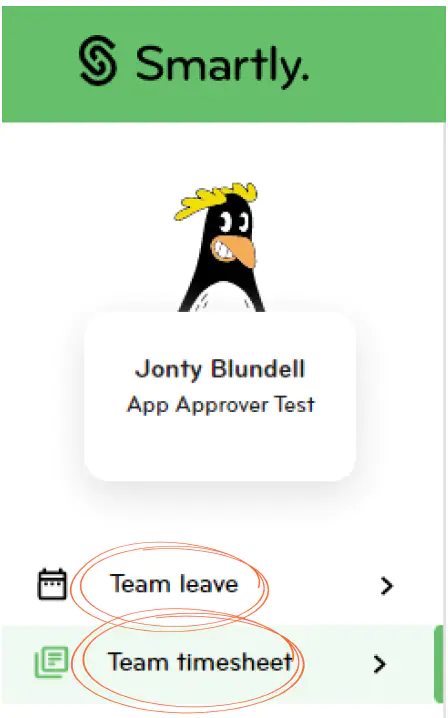
Once you've logged in, you'll be taken to the Home page. In the left hand menu are 'Team leave' and 'Team timesheet'.

You can access the 'Timesheet approvals' screen by clicking the arrow next to 'Team timesheet'.

You can access the 'Leave approvals' screen by clicking the arrow next to 'Team leave'.

Managing your team's timesheets
When you click into 'Team timesheet' you'll see 3 tabs, 'Pending', 'Approved' and 'Completed'.

Under the 'Pending' tab, you'll find all timesheet entries that are waiting to be approved.
You can 'Approve' or 'Decline' an employees entry by clicking the pencil icon.


You can 'Add' timesheets under the 'Approved' tab.

Select the correct employee, and then click 'Add entry'.

Once you click 'Add entry', a pop up will appear. Fill in all the details for the time entry, then click 'Save' once completed.

You can also 'Edit' and 'Delete' a time entry in the 'Approved' tab. Click on the white pencil icon to edit an approved time entry.
Or click on the bin icon to delete a time entry.

In the 'Completed' tab, you'll be able to view timesheet entries that are completed. You can search multiple employees and view all at once, or you can search for a particular employee.

Managing your team's leave
Our 'Leave approvals' section lets you manage your teams leave requests all from one place. You'll be able to approve, decline, edit and add leave on behalf of an employee.

You can view all types of leave requests on your 'Leave approvals' screen. Or simply select a leave type you want to view.

You can also filter your view by the leave status. Select 'Pending', 'Approved', or 'Partially Processed', or simply 'Select all' to view all leave statuses.

Use the 'Search' section to search an employee name to show their leave requests.

To open and edit a leave request, click on the pencil icon.

A pop up will appear that allows you to edit, save or decline the employees leave request


To add a new leave request, simply click 'ADD LEAVE'.

A new leave request will pop up on the screen.
Fill in the information for the request, then click 'SAVE'.

