Timesheet import from a third party provider
Time and attendance software
We integrate with multiple time and attendance software companies that are catered for the New Zealand business environment; these include and are not limited to:
.png/_jcr_content/renditions/optimized.webp)
- APT Childcare
- Biotime
- Builda Price
- BundyPlus
- CB Systems
- CleverTime
- Deputy
- Discover
- Fergus
- goRoster
- Humanforce
- iDt group
- Infocare Solutions
- Lauranka
- Lentune
- Loaded
- NextMinute
- PropertySuite
- Rosterit
- StaffSync
- Tātou
- Timble
- Timecloud
- TimeDock
- TimeTarget
- uAttend
- Xero Practice Manager (XPM), and more!
If you have any questions regarding the above companies that integrate with us, please call our Solutions team on 0800 10 10 38 Option 2, or email them at solutions@smartly.co.nz
How to use the 'Timesheet import' feature
1. To use the Timesheet import feature in Smartly, you would first need your employees' timesheets and/or leave hours in a configured CSV file.
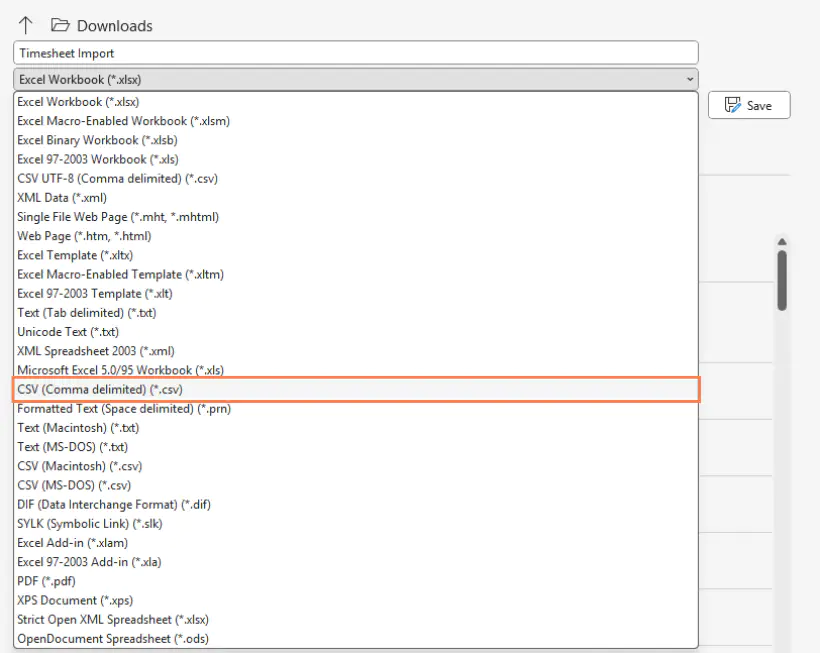
For the timesheet import to work, the file MUST only be in CSV format. To do this, ensure when you save your Excel file, you save it as a Comma delimited (.csv).

If you use one of the above companies to track your employees' hours, you can simply choose Smartly (or SmartPayroll) as your export format, and then click Export from your time and attendance company. The CSV file will be all configured for you.
If you do not use one of the above time and attendance companies, do not worry. Simply configure your CSV file following the instructions from the below section, How to configure a CSV file for 'Timesheet import'.
2. Log into your Smartly site. Hover your mouse over Pay run options and click Timesheet import. Make sure there are no unprocessed pays for the pay period.

3. Choose the pay group that the timesheet will be imported to and then click Select file to import.

4. Select the CSV file you'd like to import and click Open.
5. A 'Success' popup window will appear confirming that the file has been uploaded. Click Ok.
6. Check the timesheet details for any errors and then click Submit. Note: An 'Error' message will appear in red; A 'Warning' message may appear in orange. Errors and warnings need to be investigated before a timesheet can be imported.

7. When you click Submit, a popup will appear asking which pay run you'ld like to import the data into. The Direct Credit date must be no earlier than today's date.
8. Choose where you'd want the leave information to be extracted from. To use leave from your CSV file, click Use leave from timesheet. To use leave from the Smartly app, click Use leave entered in Smartly. You can also tick on Always use these settings if required.

9. Click Submit to complete the import. You'll see a 'Success' popup indicating that the timesheet has been submitted.
10. Once you've submitted the timesheet, the screen will revert to the Run a pay screen where you'll see the pay details have been produced. You can still make changes by double clicking into an employee's name. Please remember to click Save to save any changes you've made to an employee's pay details.
Note: When running a pay, we recommen you use the Check payroll feature under Run a pay to ensure the information is correct before you process your payrun.
How to configure a CSV file for 'Timesheet import'.
#50 normal pay
Example:

Employee with the code, JJ, is to be paid their main pay rate (pay rate 1) for 32 hours of work over 4 days.
An employee can also have a second or third pay rate (numbers 2 and 3 respectively).
You can have multiple #50 lines for the employee but the Number of Days Paid should be in the last #50 line.

If the employee has their costing set to Enter at pay time, the department quick code needs to be used.
Example:

#51 allowances, deductions, and benefits
Example:

Employee with the code, OM, has 10 units of either an allowance, deduction, or benefit with the code 101. To check which one it is, you would need to refer to Company details > Pay components.
Note: The code is set up by the payroll admin under Company details > Pay components.
Leave types

Example:

Employee with the code, JJ, took 8 hours of sick leave from 7 July 2023 to 7 July 2023.
Note: For Special leave (#71), a code will be needed after the 'Date to' field. This code is set up by the payroll admin under Company details > Pay components > Special leave.
