Timesheet guide for employees
Track your timesheets on-the-go with the Smartly app.
For a complete overview of the Smartly app including how to apply for leave, please refer to our employee mobile app guide.
Timesheet status definitions
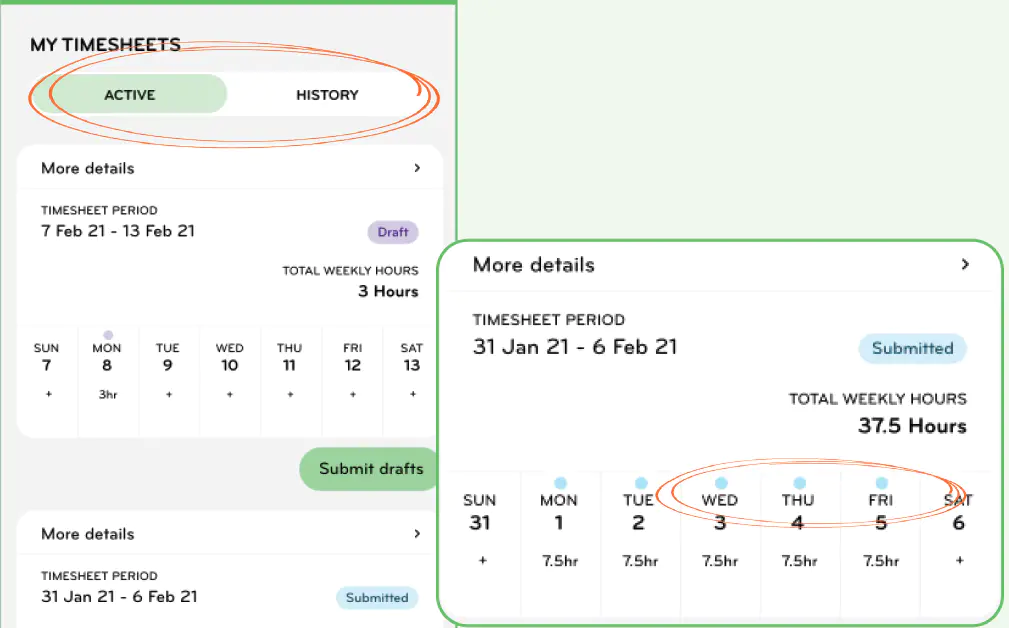
The Timesheets section defaults to an Active screen where you can see a list of your timesheets that are yet to be processed by payroll. These can be in one of four states:
Draft - you can continue to make updates until submitted.
Submitted - sent to your manager and can’t be edited.
Approved - approved by your manager and can no longer be edited.
Declined - rejected by your manager and can be edited so you can resubmit.
Time entries can be added to any active timesheet no matter what the status is.
New timesheets will appear on the day your new pay week begins.
Once a pay period has been processed, you can no longer add timesheets to this pay period as it is now closed. Please notify your payroll admin if you have more hours to add against a closed pay period. Your payroll admin may ask that you send them screenshots so that they can add those hours as a Manual Pay in the Smartly website.
All completed timesheets will automatically move to History once they’ve been paid.

Move between Active and History to see your unpaid vs paid timesheets.
The coloured dots on the image above show the status of your time entries for that day.
Timesheet cards
These show a 7-day working week and give you a summary for that pay week, including the number of hours worked on a given day, the total number of hours worked that week, the status of your daily time entries and overall timesheet.
If you get paid monthly, days that fall into a different pay period will be greyed out and can’t be edited in this timesheet.
Adding time entries
To add a new entry to a timesheet, follow steps 1-3 below.
As you’re adding your time entries, they will stay in draft until you submit them.
When you submit your timesheet, all your draft time entries for the pay week will be sent to your manager for approval. Once submitted, no further changes can be made to the timesheets.
You can only edit draft or declined time entries. See step 4.
1. Tap More details or a day of the week.

2. Choose the day you want to enter your time entry for and tap Add time entry.

3. Choose your pay type, start and end times, enter any unpaid breaks and comments and tap Save.

4. To edit, tap an entry, update and tap Save. You can delete an entry from the edit screen as well.

Costing your hours worked
Your employer may be tracking labour costs across the business/departments. If you see a Costed to field in your time entry screens please ensure you are costing your hours against the correct department, project or job. If you are unsure, please speak with your manager.

Copying a previous timesheet
If you have worked the same or similar hours as another week, you can copy that timesheet over.
1. Tap Timesheets and then tap Copy week.
.png/_jcr_content/renditions/optimized.webp)
2. Choose which week you want to copy from, and which week you want to copy to. Tap Add.
.png/_jcr_content/renditions/optimized.webp)
Note: If you’ve been set up with the ability to cost hours to departments, projects or jobs, please make sure this field is correctly filled in before submitting.
